.png)
MAPS MOBILE
Plan business trips, courier deliveries, build routes using Google Map directly in your Bitrix24 or just watch all your clients on the map. Start your free 14-day trial period.
-
Rating
-
Installations1253
-
Developer
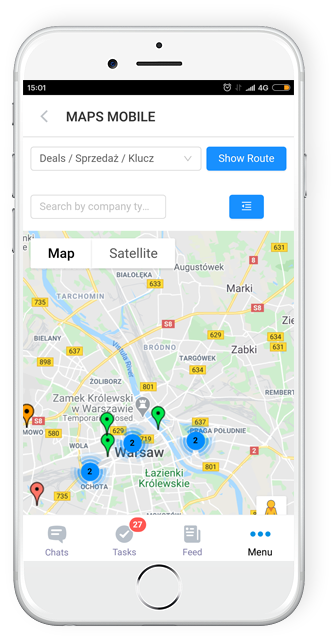
Plan meetings with clients based on their geographical location or plan courier deliveries. Build routes in your Bitrix24 and watch all your clients and partners on the map.
Application Functionality:
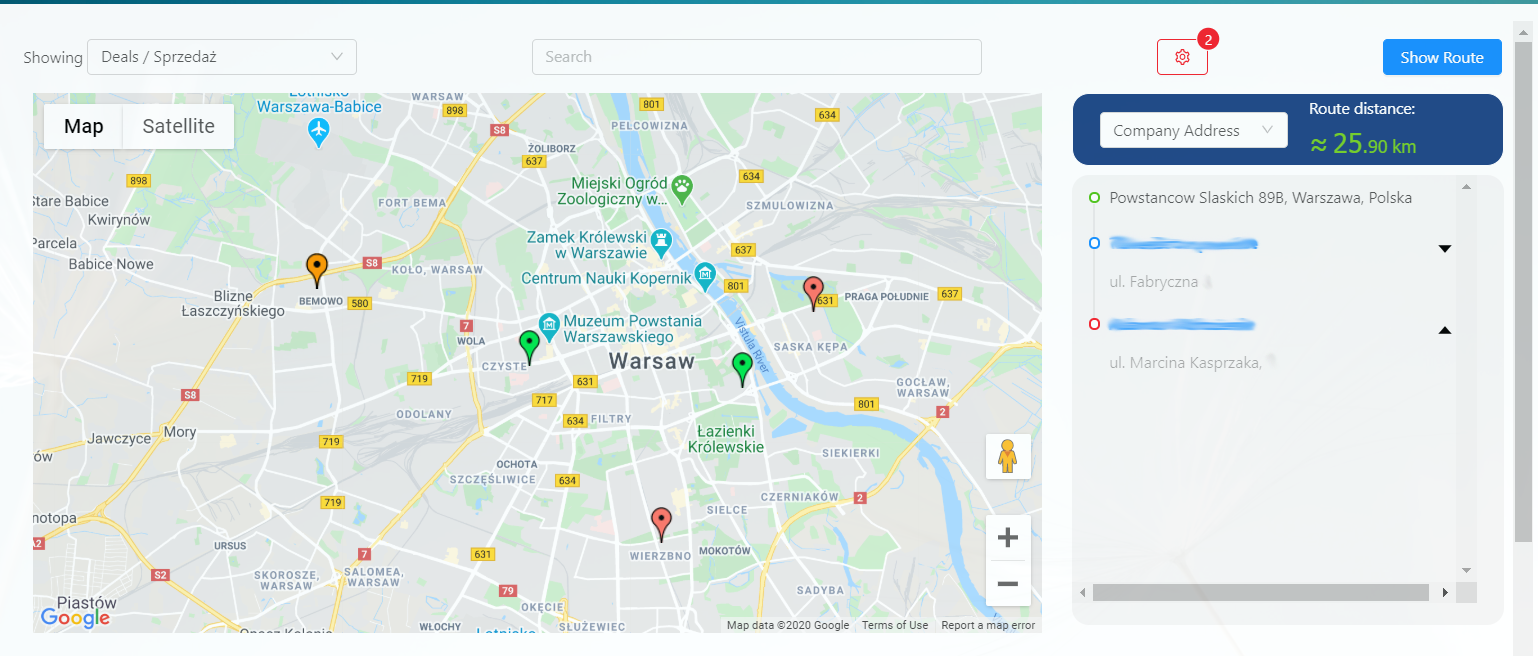
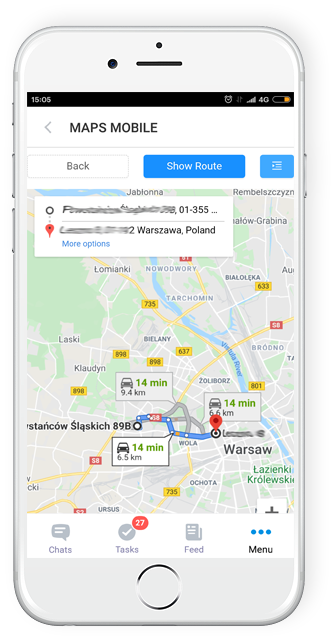
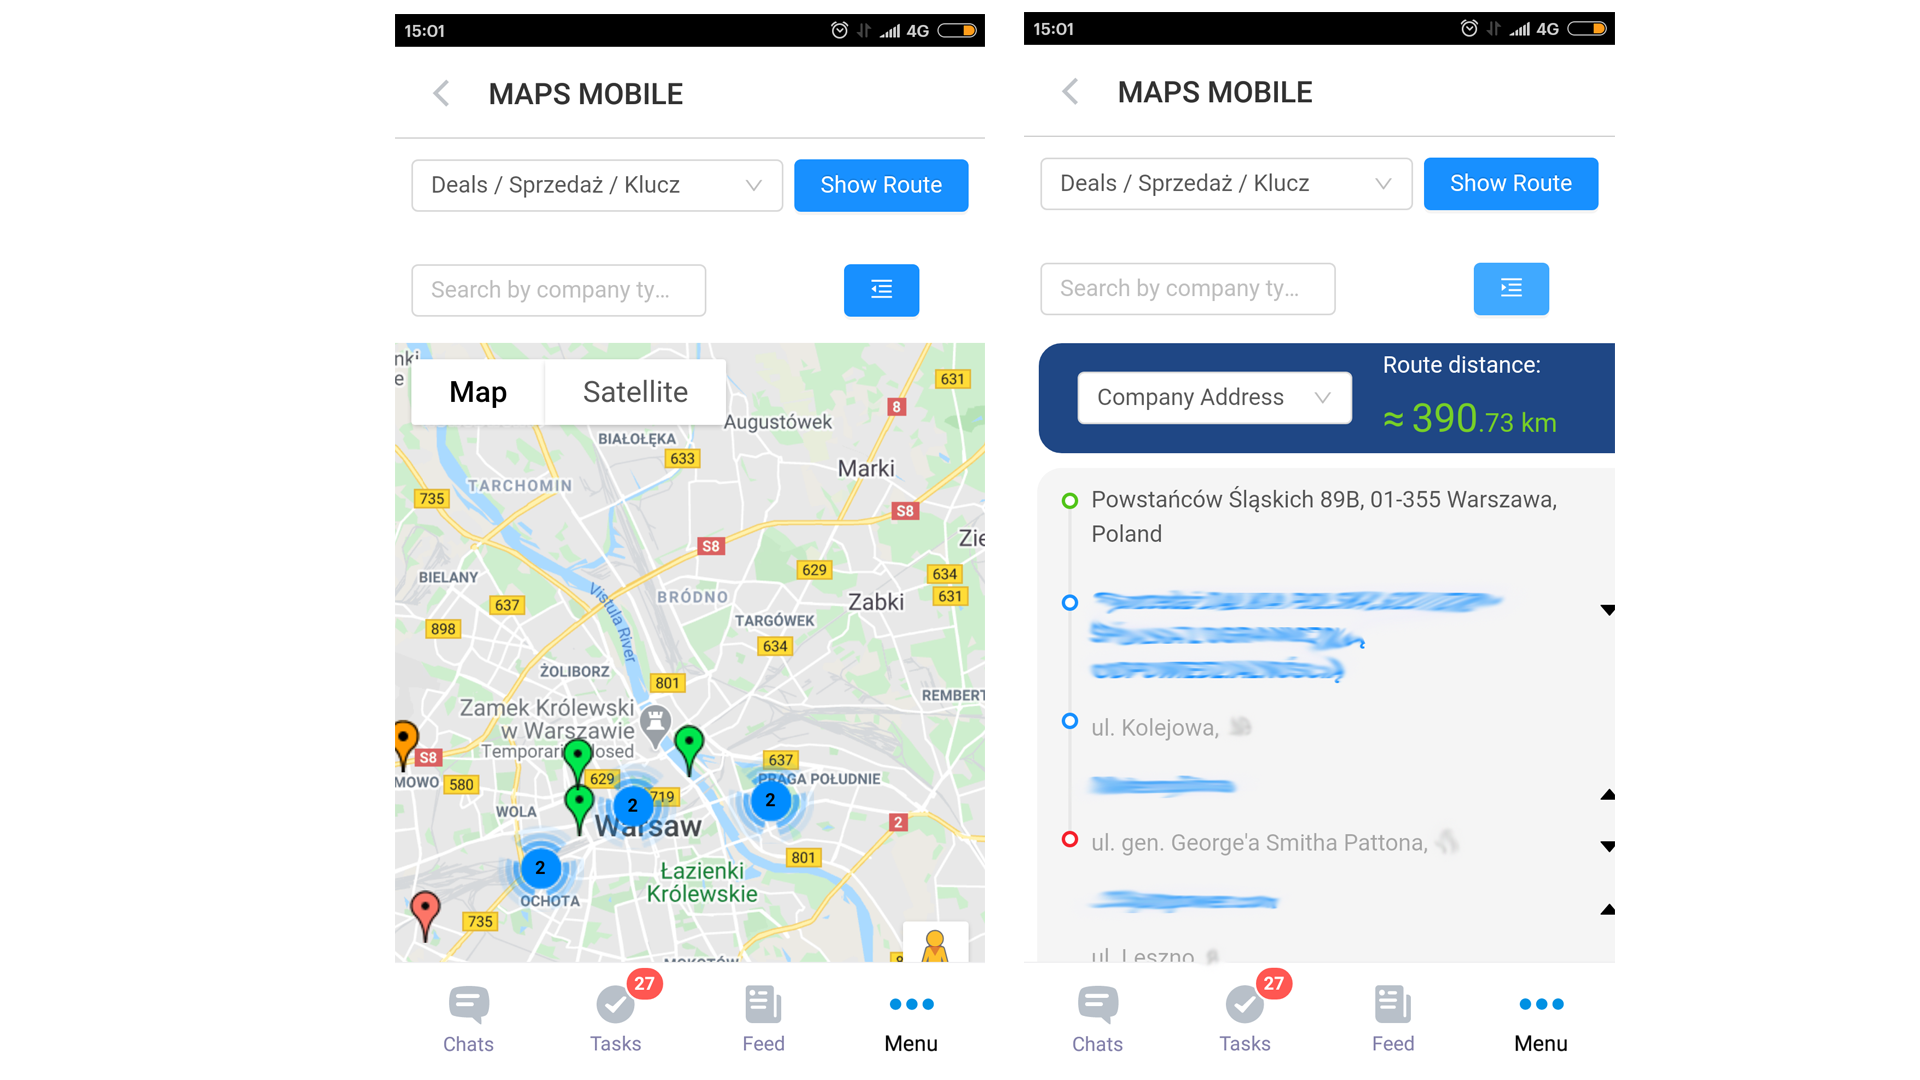
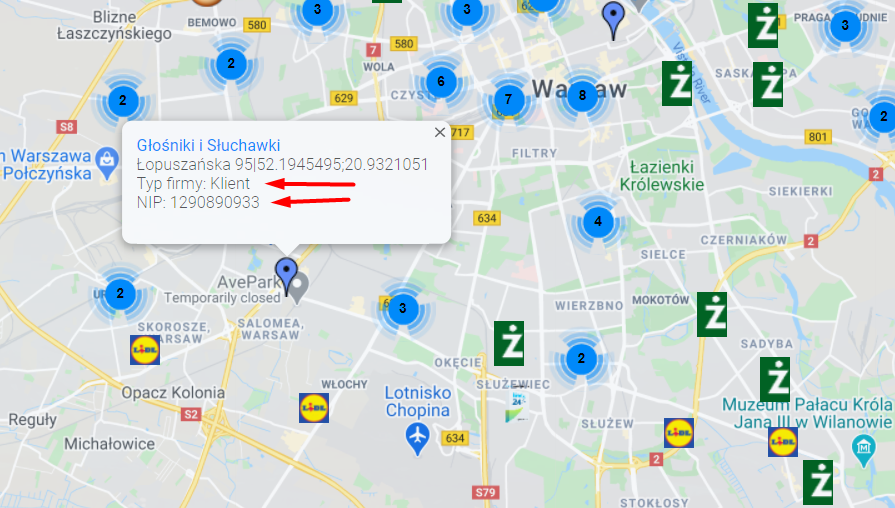
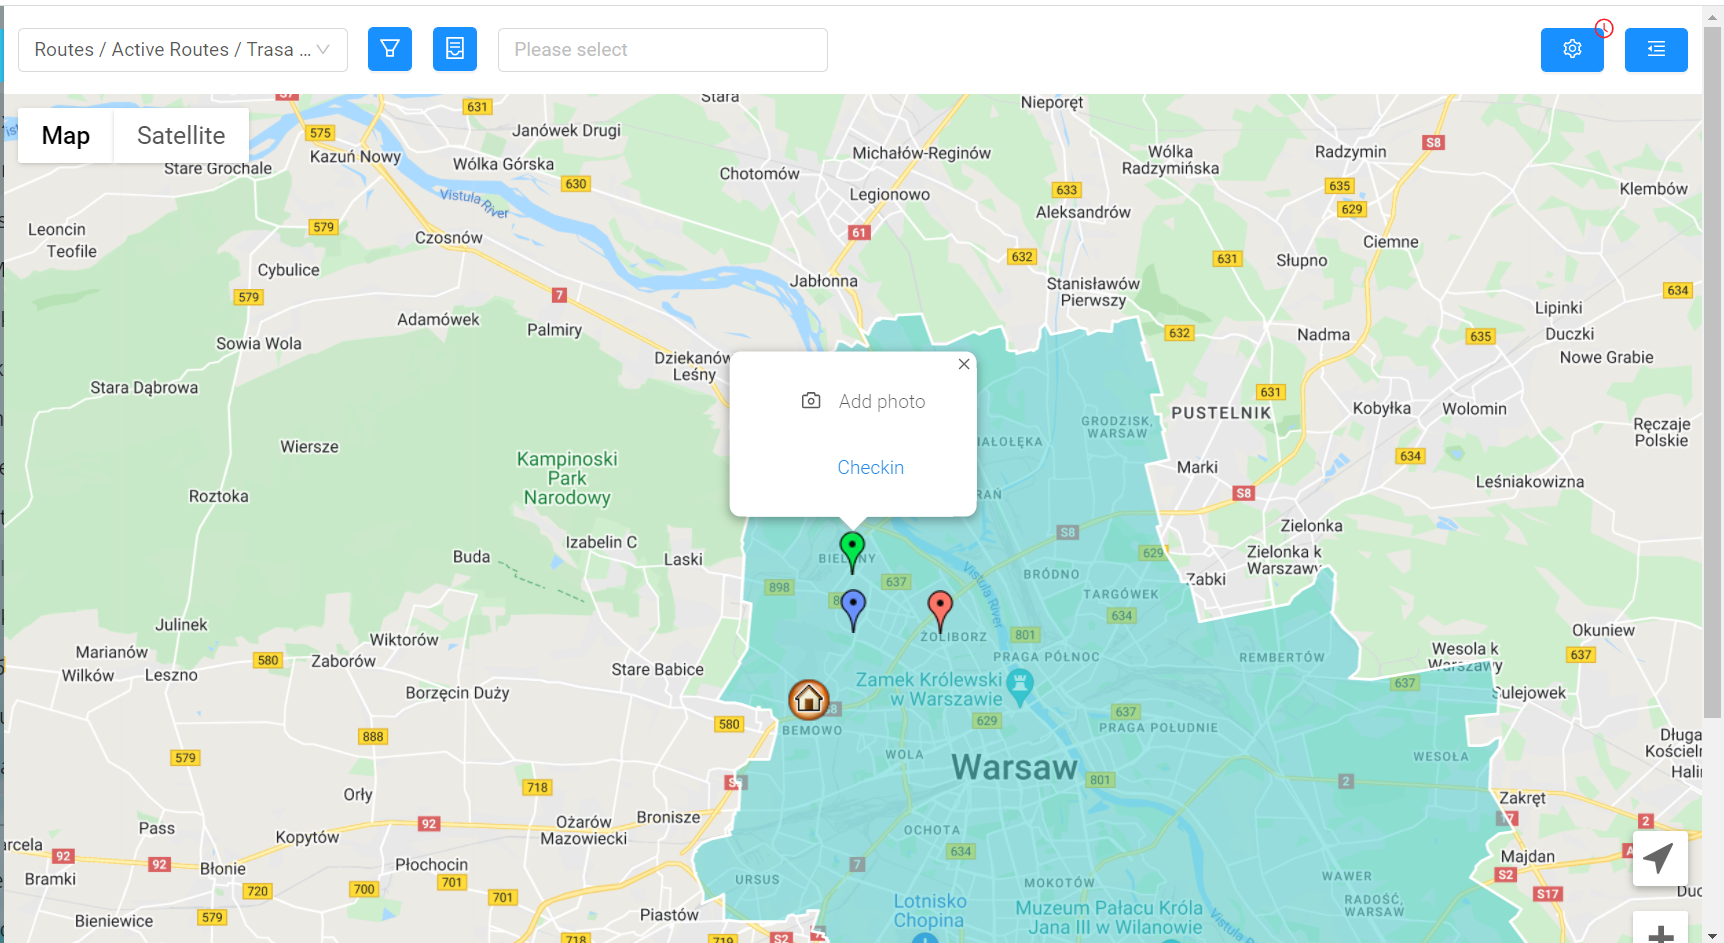
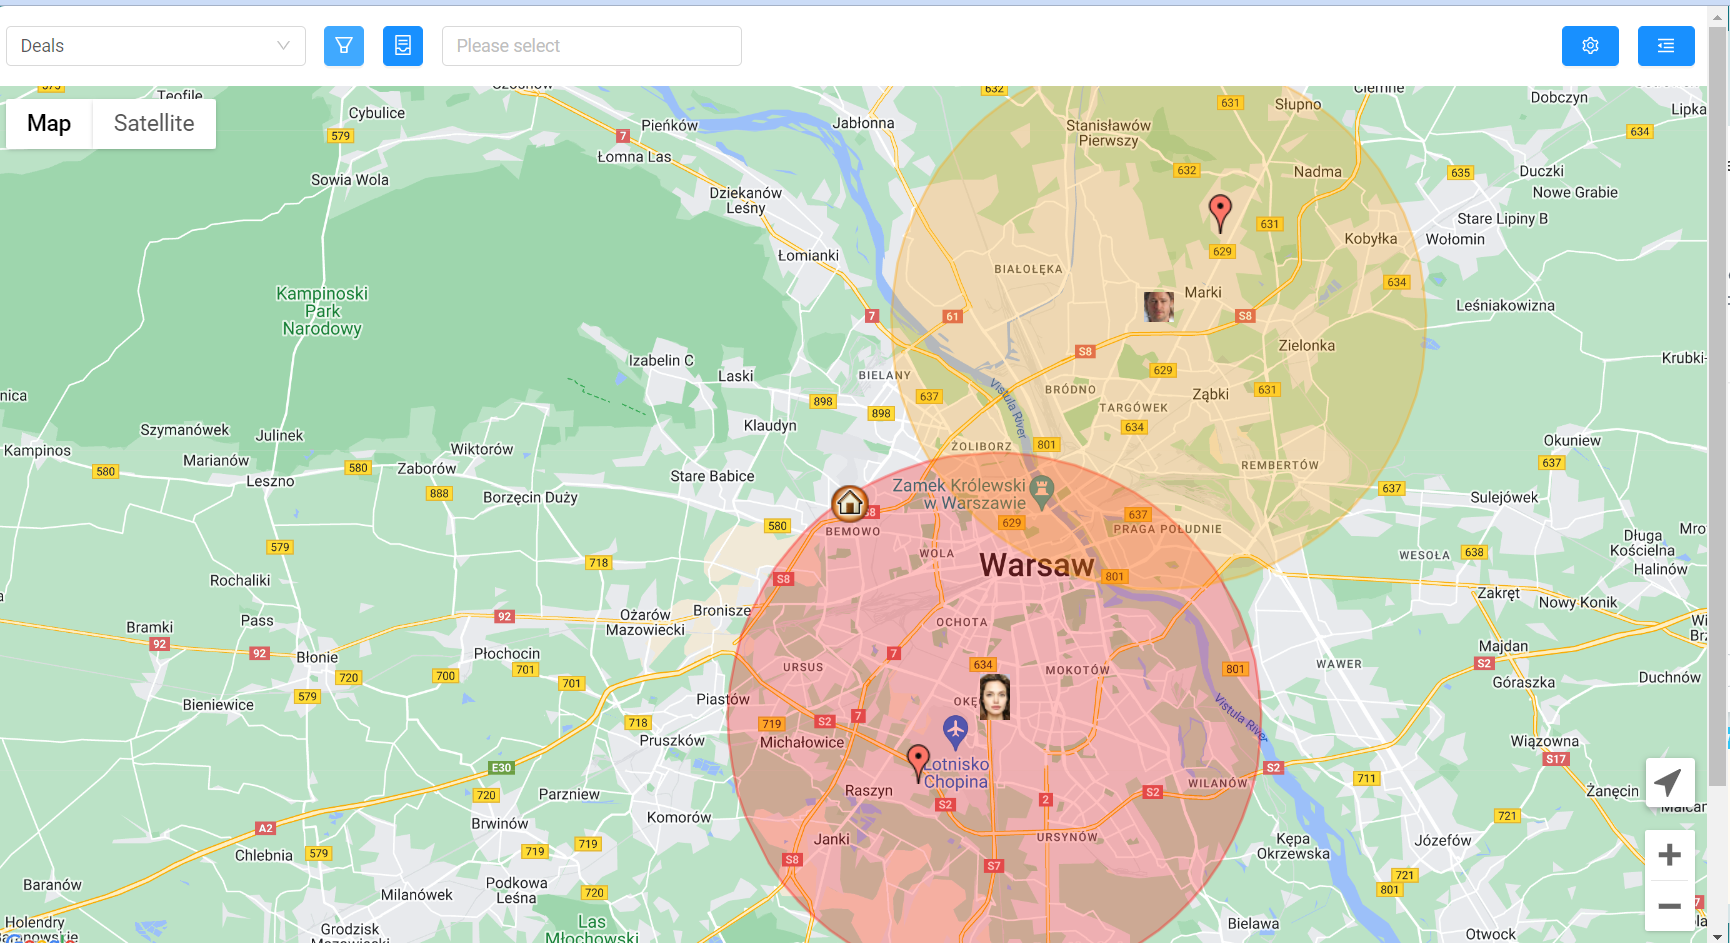
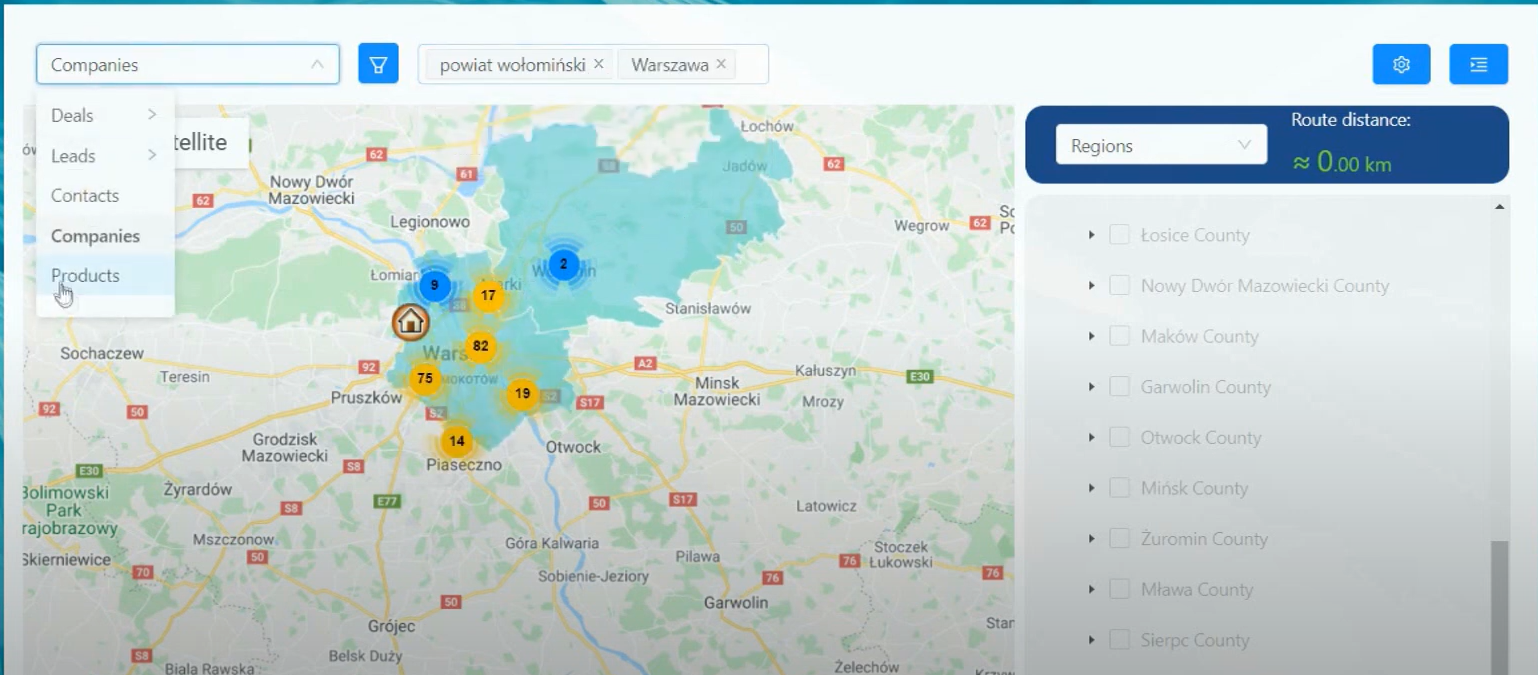
✓ Display Leads, Deals, Contacts, Companies, Products, Resource Booking - directly on the map
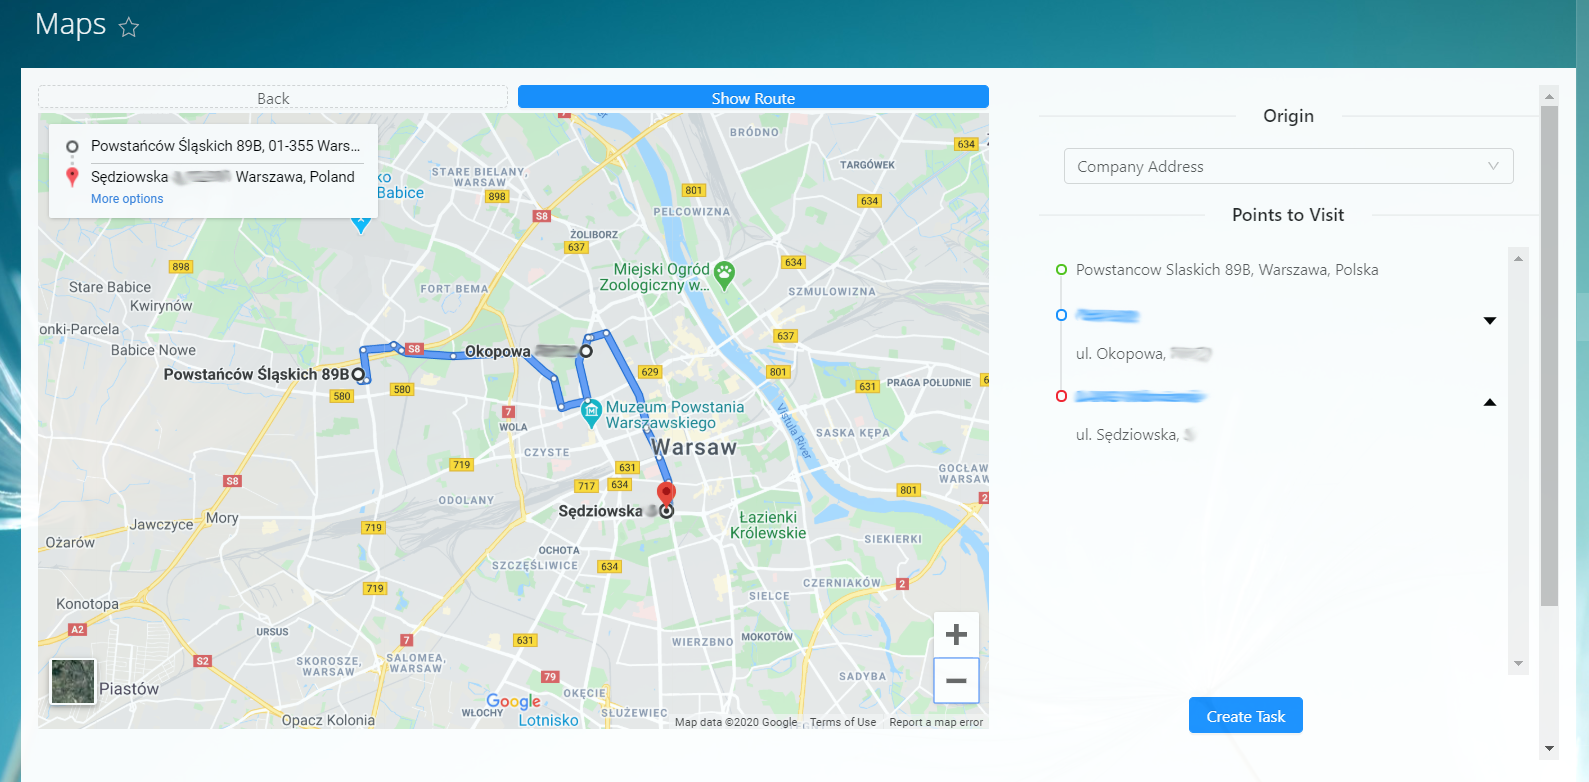
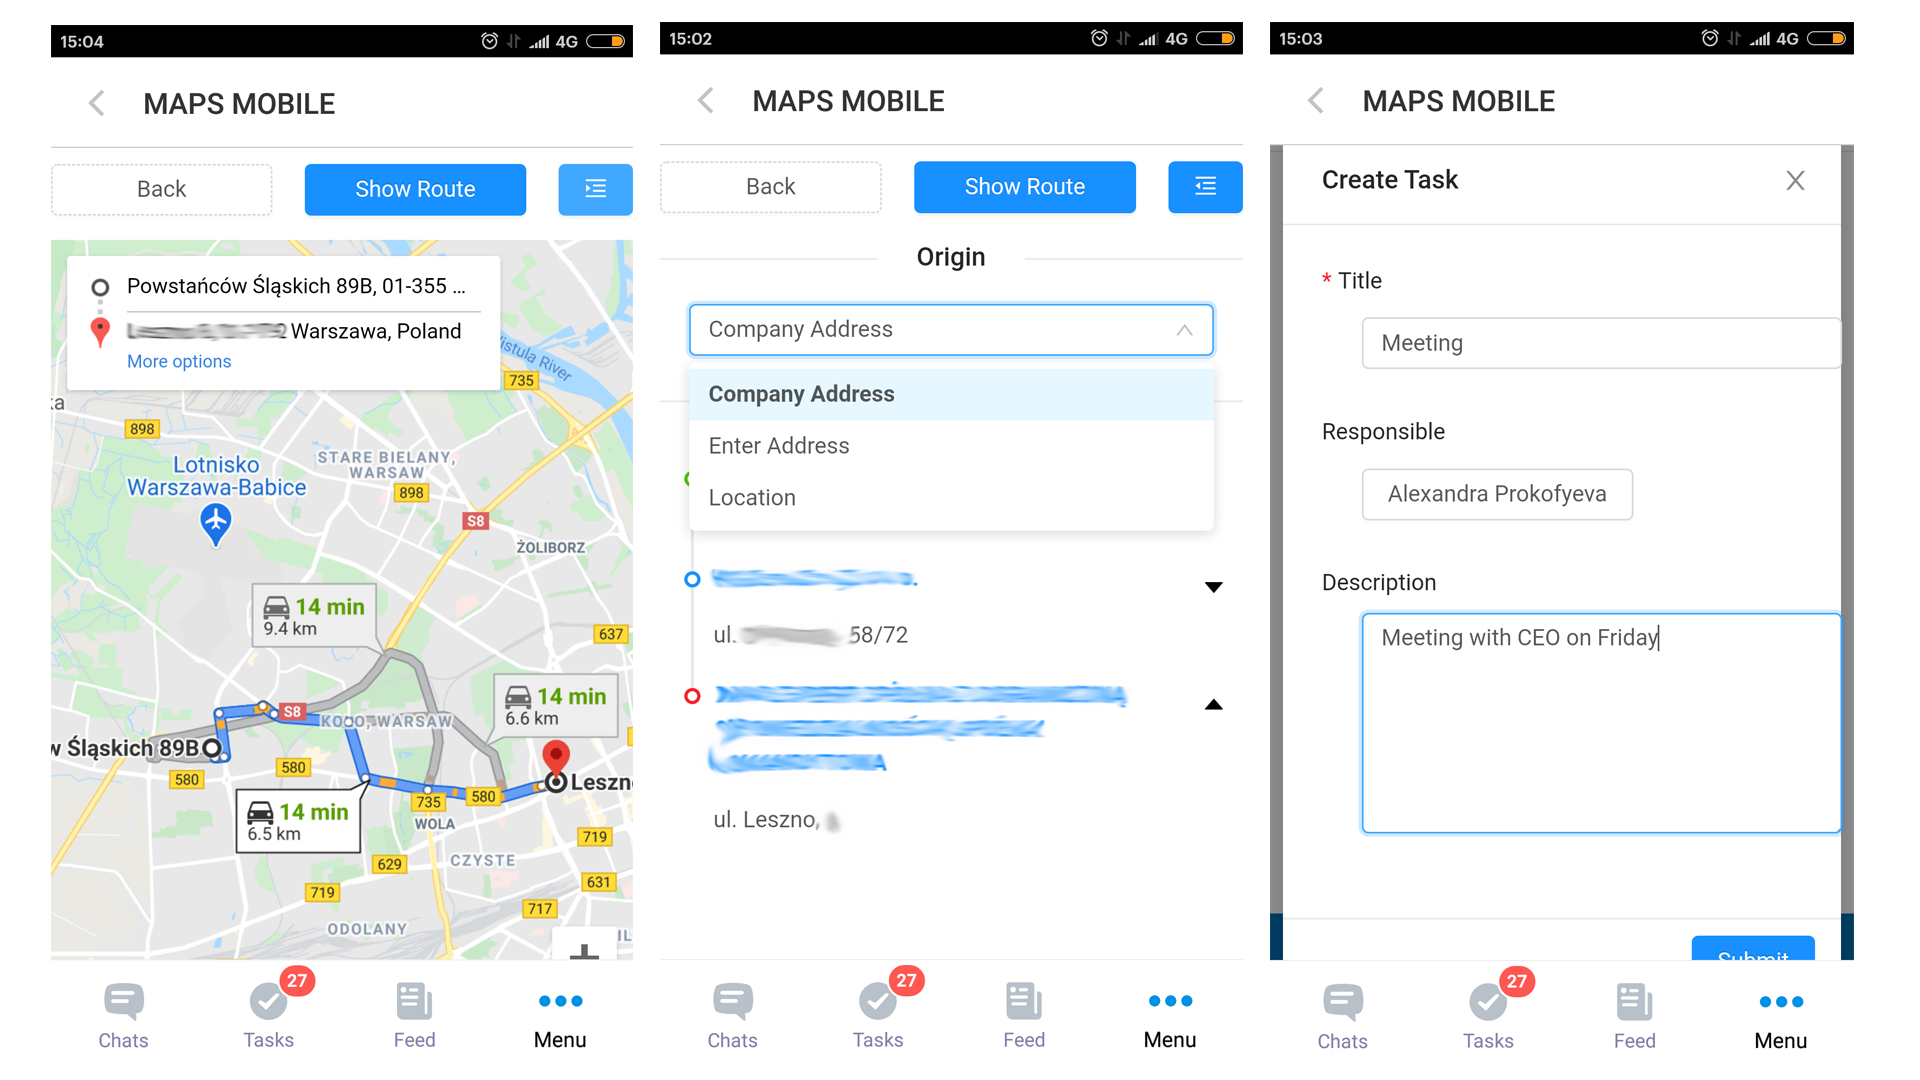
✓ Route planning with visiting multiple points
✓ Start Point Definition (Company Address, Your address, Certain address)
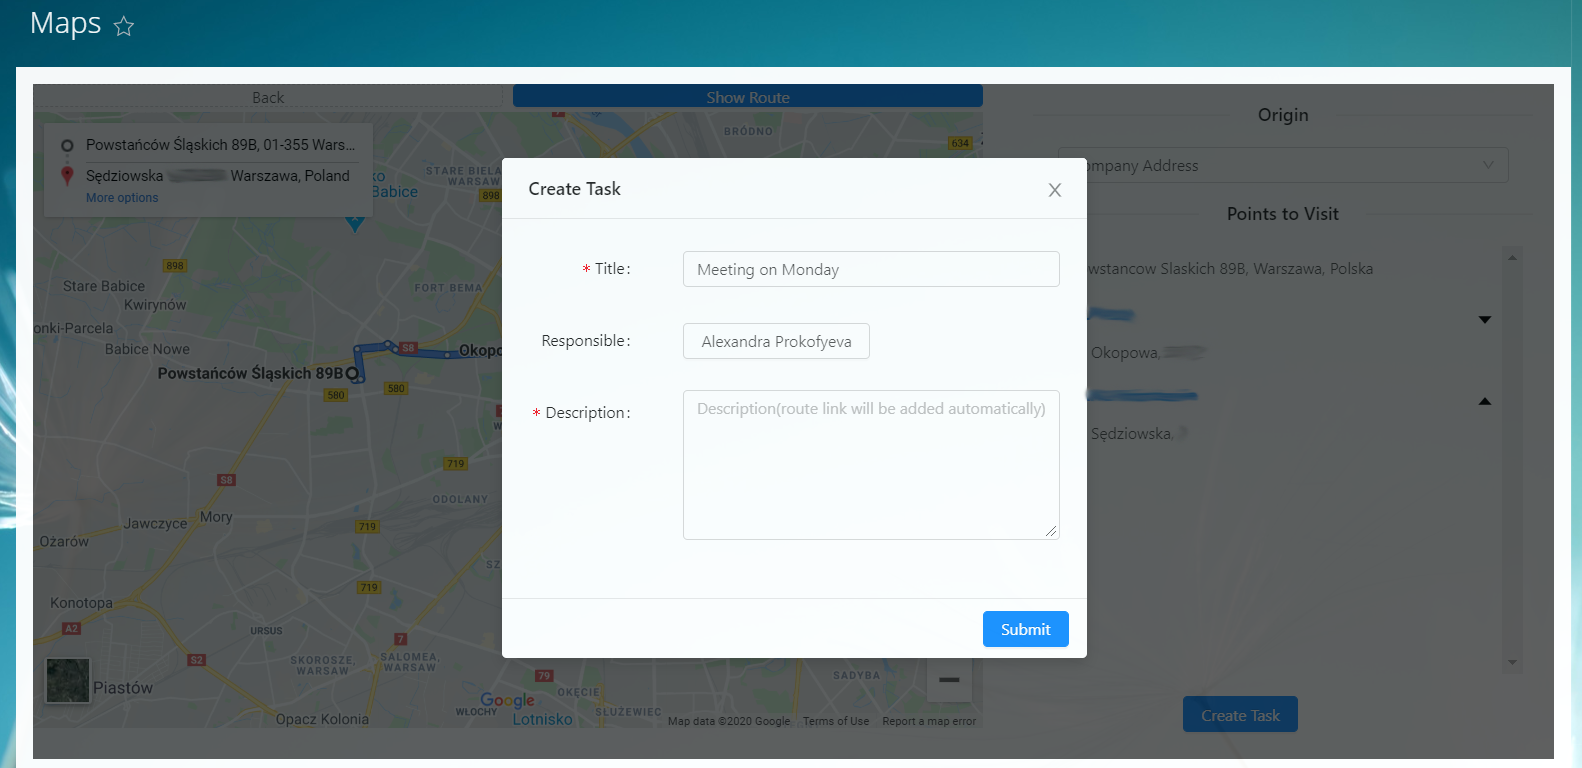
✓ Creating tasks with a list of locations directly from application
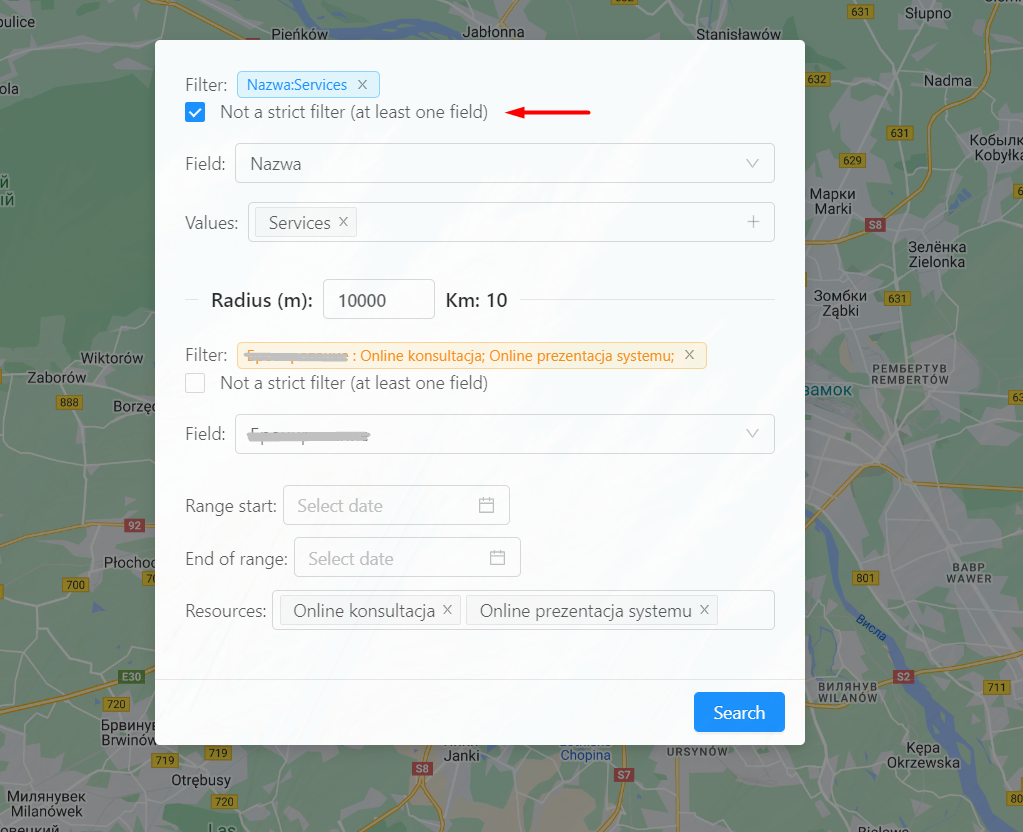
✓ Objects filtering directly on the map
✓ On-demand cache update in the application
✓ Integrated with external systems
✓ Change vehicles and drivers
✓ Finding and displaying objects in a radius from the main point
✓ Works directly from the Deal details form
✓ Export of route points to Excel, CRM entity detail form and KML-format for My Google Maps (for users who don't use Bitrix24)
✓ Regions of responsibility and filter by region (It is possible to assign a manager to a specific region. You can filter objects on the map by region, check which points are in the area of responsibility)
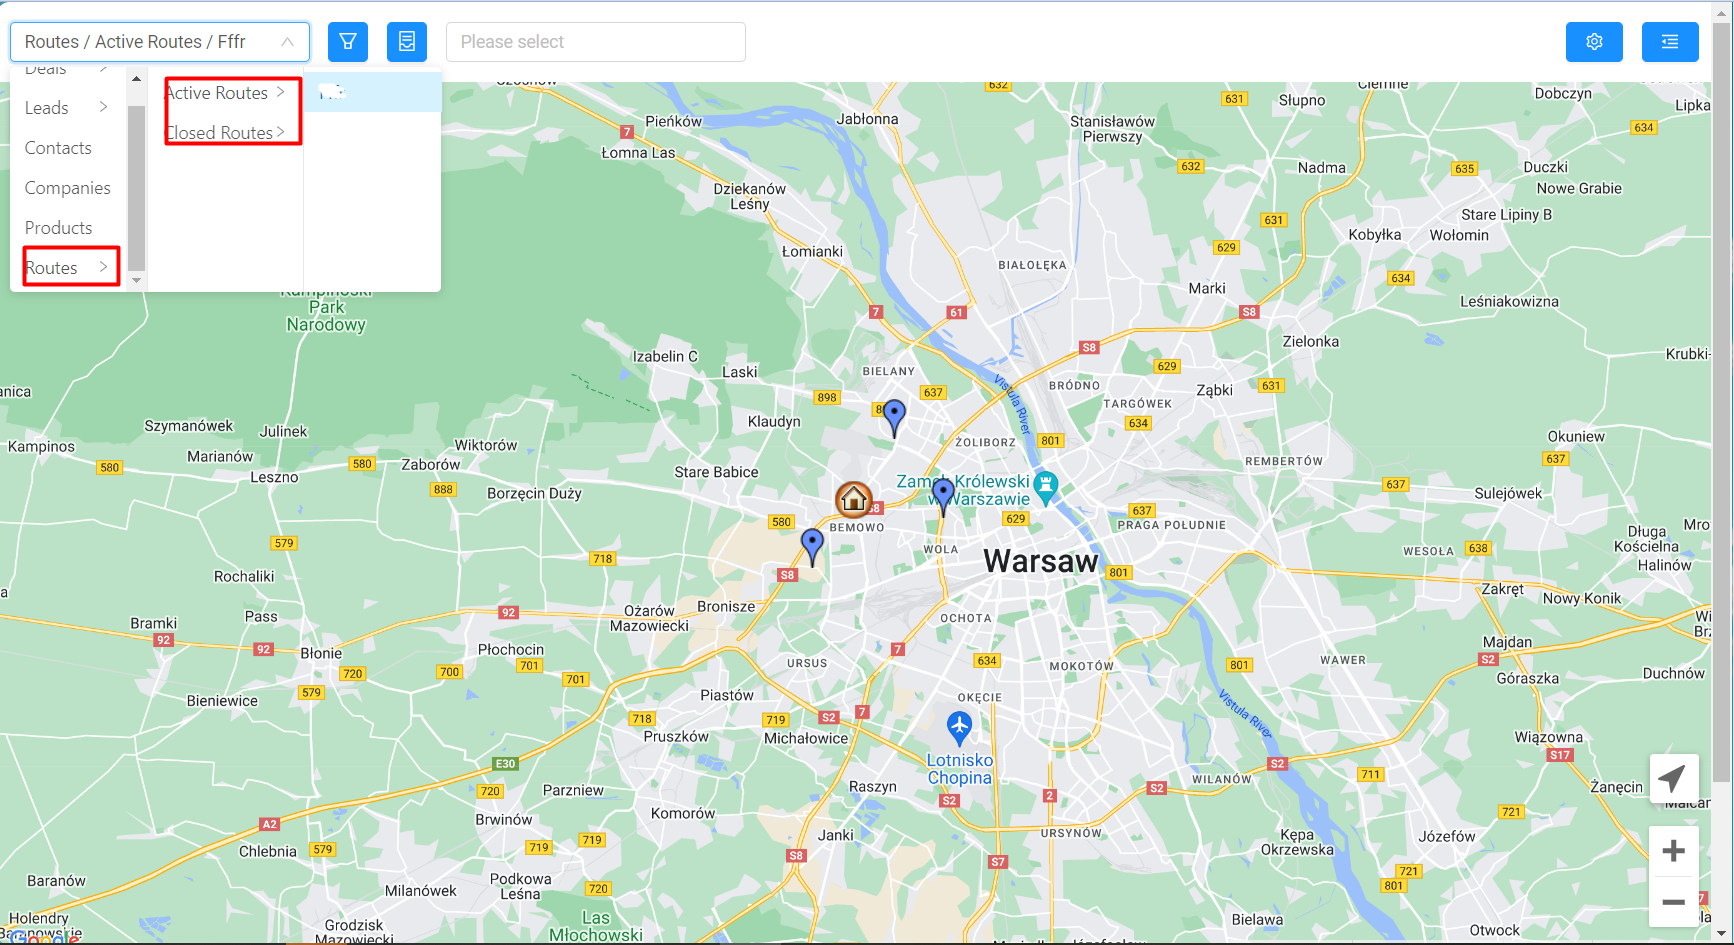
✓ Creation and saving Routes (active, closed) as a entity, point's check-in (with GPS checking) and attaching a place's photo
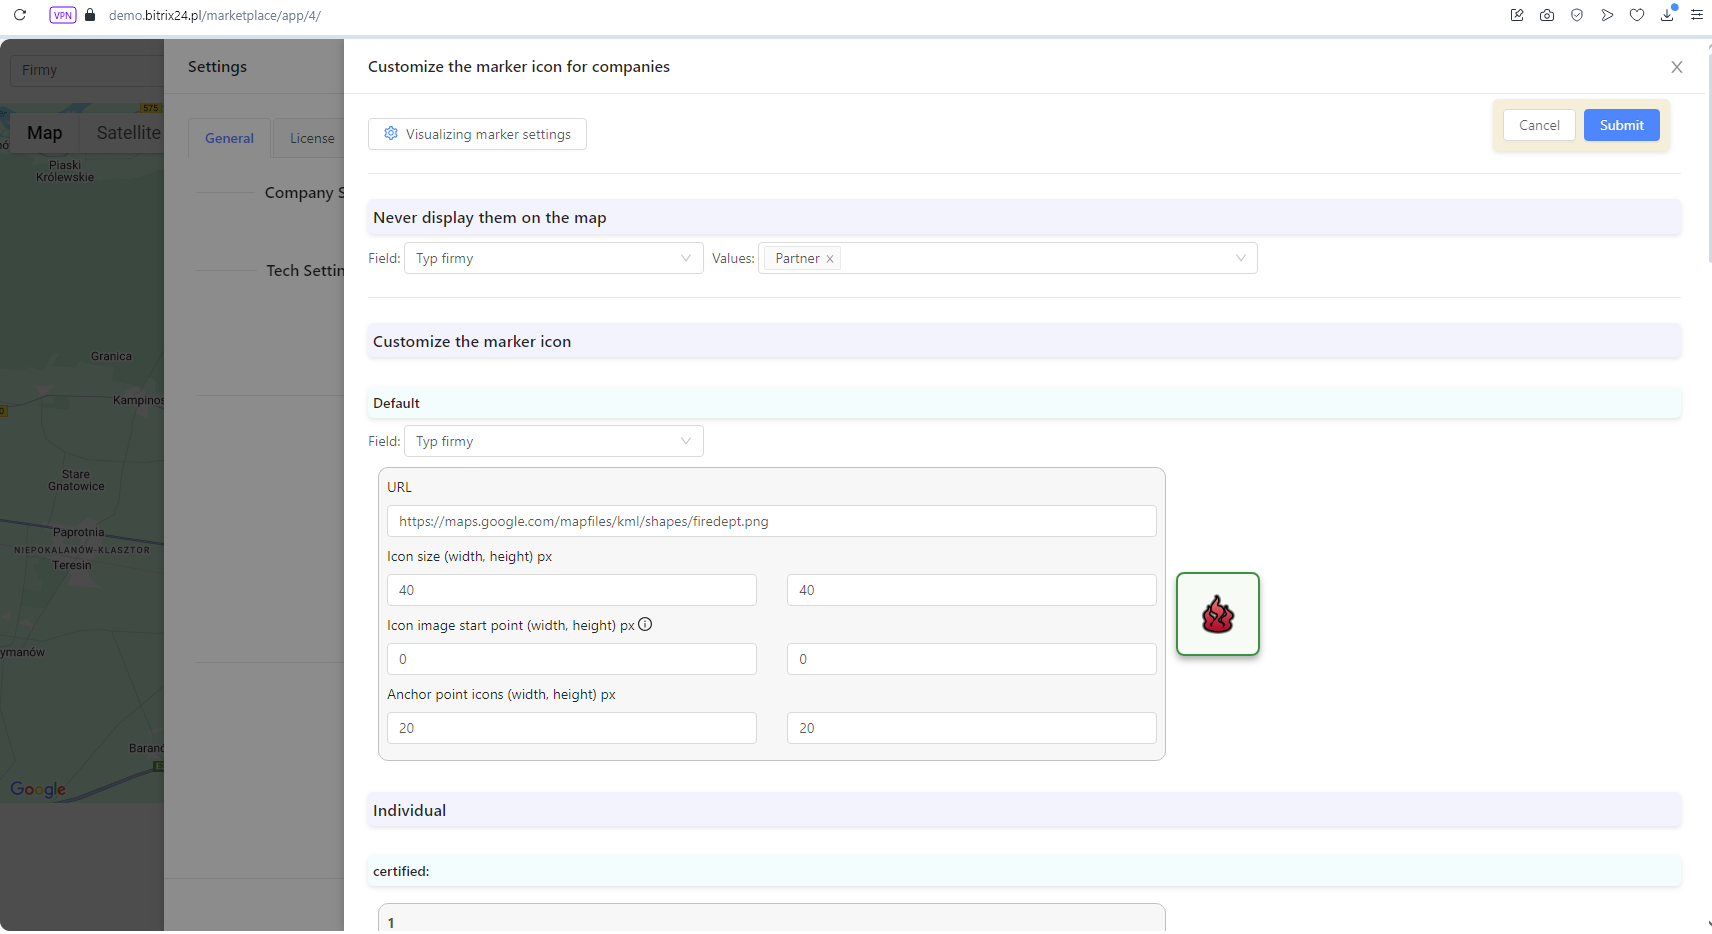
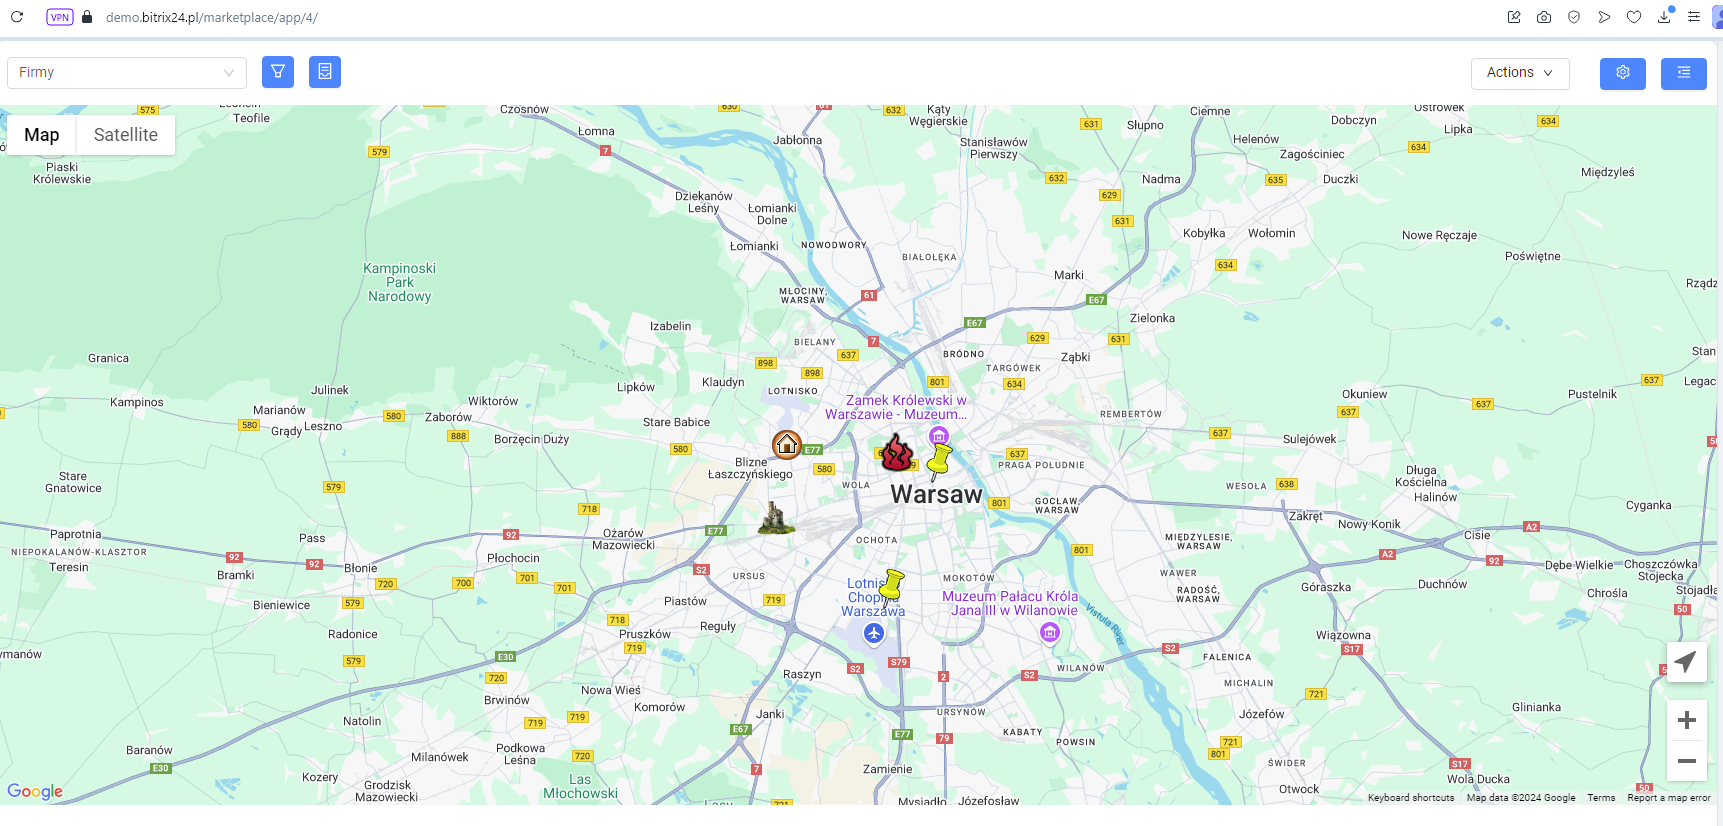
✓ The ability to hide specific companies on the map, as well as settings for custom design to display company address icons
______________________________________________________________________________________________________
Start your free 14-day trial period.
Cost per year €360 (netto). Buy license key.
______________________________________________________________________________________________________
This app is a flexible solution that can be used both in its standard functionality and by adapting it to your business purposes. We offer our application optimization services in terms of the requirements, goals and tasks of your company.
Application can be used in English and Polish language.
Among possible changes and remakes:
✓ Setting fields and adding data fields
✓ Creating the necessary stages or business process that works on the base of the application
✓ Language and country (geographical) adaptation
✓ Integration with other systems
✓ Customizing application design
✓ Any changes in the application logic and much more
.png)
.png) Free
Free
Automatic creation of a company by NIP (Tax Identification Number) based on GUS data. Now you don't have to manually enter the company and its data every time. All you need to do is to know your NIP number and all other information - Company name, Country and City, Province and Community, full address with zip code - will be filled in automatically. A check is also performed on the list of VAT payers. Start your free 14-day trial period.

.png)
.png)
.png)
.png)

